Showing posts with label Landscape. Show all posts

Sunday, March 10, 2013

The Watchman

Zion Watchman
ISO: 100  Focal Length: 15mm 
Aperture: f/6.3  Shutter Speed: 1/50
Filter: Lee 0.9 GND Soft Edge
Shooting the Watchman with the Virgin River is one of Zion's iconic shots. I didn't want to make my shot like what most people were doing so instead of shooting from the road I wandered down the Pa'rus trail a little bit until I found this spot. It was nice because I was the only photographer there and when I walked back to the road there were probably 15-20 photographers cleaning up. I used a little lower aperture number than I would normally use because I didn't like how my shots were turning out with the water blurred. The Lee GND was key for this shot and it really helped balance the exposure between the foreground and the sky. Lining up a GND is pretty easy. I handhold my filters. To start I hold the filter against the lens with the dark part of the filter completely out of the frame and then while looking through the viewfinder I slide the filter down until the transition between light and dark is against the horizon.

When I got this shot into the computer I still thought the exposure wasn't balanced like I wanted it to be. So I loaded the single RAW file into HDR Efex Pro and tone mapped it. At first the result was WAY too strong so I dialed back the settings by about half in order to get a realistic result. I came away being very pleased with the shot. 

If you love the national parks please check out my kickstarter project on the right.

Tuesday, January 1, 2013

Holbrook Canyon

ISO: 100  Focal Length: 13mm 
Aperture: f/13  Shutter Speed: 2.5 seconds
Exposure Compensation: +1.33

It was a very cold morning when I got up to shoot this. When I arrived at Holbrook Canyon it was snowing. Luckily, I had an umbrella in the car so I could avoid getting snow on the front of the lens. After walking down into the canyon I made my way to the creek and worked through a few compositions before I finally arrived at this one.

Composition


I composed the image this way mainly because of two things. The ice and cascade provide a definite focal point for the image and the way the creek meanders around the snowy outcropping creates great leading lines that create depth. Notice how the eye immediately goes to the cascade and then will generally follow the stream. The use of curves like this is an excellent way to make a stronger composition.

Post Processing

Once I got the image on the computer I took down the highlights some to bring some texture back into the snow. I sharpened the image and added some definition to make the ice pop out even more.


When shooting snow you will usually have to overexpose the image. If I did not use a +1.33 exposure compensation the snow would have shown up as a grey color.


Saturday, December 22, 2012

Oceanside Pier

ISO: 100  Focal Length: 13mm 
Aperture: f/22  Shutter Speed: 1 second
Filter: Lee 0.9 GND Soft Edge

The Shot

It was a beautiful night at the Oceanside Pier. There are so many good shots to be had around a pier. For this shot I wanted the reflection of the pier to be my foreground element so I had to wait for the moment when the waves were out. I moved about 100ft to the side of the pier until I liked the diagonal it was making in the frame. One of the things I like most about the composition is all the leading lines. The pier, clouds and colors of the sunset make great leading lines to the end of the pier where the sun adds more visual weight to the end of the pier. 

One of the real keys for this shot was the Lee graduated neutral density filter. By placing the filter transition correctly you can balance the light between the sky and the foreground. It made it so I could retain great details in the bright sky as well as the foreground.

Post Processing

In order to make the image more like the scene I remembered at the pier I boosted the saturation up to 1.8, adjusted the black point to 37, and then reduced the luminance of the blue channel slightly. The final step was to add edge sharpening and I decided to add a vignette. 

Thursday, December 20, 2012

Shooting the Stars in Joshua Tree

ISO: 1600  Focal Length: 11mm 
Aperture: f/2.8  Shutter Speed: 30 seconds
You don't have to stop shooting when the sun goes down. To get great pictures of the stars you will need a few things.
  1. A very dark place away from the city. In this picture from Joshua Tree you can see some light pollution from the city of 29 Palms even though the city was 15-20 miles away.
  2. Little or no moon. To have the best view of the stars shoot when there is no moon or the moon is just a sliver.
  3. A DSLR with long exposure noise reduction turned on. Long exposure noise reduction will essentially create a second black exposure of the same length as the original shot to see where the noisy spots are and then it will subtract them from your shot.
  4. A sturdy tripod. It is VERY important to have a good tripod when you are doing long exposures like this. I use the Manfrotto 055XPROB Pro Tripod .
You will need to shoot at a high ISO and at a very wide aperture. Notice that I shot at ISO 1600 and f/2.8.

When you are shooting the stars, remember your normal composition rules. You still want a foreground element to add interest to your shot. When framing the shot I like to hold my headlamp in one hand while I look through the viewfinder. This way I can put enough light on the scene to compose the image properly. The foreground was lit with our campfire and the moon. You can also light paint the scene with a flash light. In the image below you can see the stars better but there is no foreground element to add interest to the image.

ISO: 1600  Focal Length: 11mm 
Aperture: f/2.8  Shutter Speed: 30 seconds

A few notes on post processing. I really didn't do much for post processing in the first image, I tried to bring more detail out with some curve adjustments but it made the foreground too bright. In the second image I raised the exposure and adjusted the black point to keep the sky black.

One last tip. If you want to avoid star trails follow the 600 rule. Divide 600 by the 35mm effective focal length and that will give you the length of the exposure you can make. For example I shot at 11mm on an APSC sized sensor so the 35mm equivalent would be 16mm. So I take 600/16 and I get 37. So I could have made a 37 second exposure.

Saturday, September 29, 2012

The Falls in the Fall

ISO: 400  Focal Length: 24mm 
Aperture: f/14  Shutter Speed: 1/4s
      On our same trip to Bridal Veil Falls I hiked up closer to the falls and there were these beautiful trees with very red leaves. I really wanted to get a shot with the red leaves and the falls behind it. In order for this to work I had to make this shot while standing in thick bushes on a steep slope. It made me very grateful for the independently adjustable legs on my Manfrotto tripod. The wind was blowing down the canyon so I had to adjust my exposure accordingly so I could get the shot I wanted. The aperture needed to be small because I wanted everything in focus from front to back, so I needed a higher ISO to keep the shutter speed lower. Normally I would've kept the ISO 100 and dealt with the longer shutter speed but the leaves were moving too much. In situations like this it is important to wait for lulls in the wind and then shoot quite a few images and look for the sharpest one when you get home.

Here are the post processing steps I went through:
Original Image
Using the white balance slider I warmed the temperature up to 61K from 58K

Increased the exposure by .15 ev
Increased the contrast and definition by .1
Increased saturation slightly on the green channel
Added a slight vignette to the bottom left corner to give more attention to the red leaves
Which gives the final image.
Head out and find some fall colors to shoot. It is a great time of year to get outside and take beautiful pictures.


Tuesday, September 18, 2012

Easy Ways to Improve Your Landscape Photograhy

Landscapes have always been my favorite subject, here are four easy tips to help you come home with better landscape images.

1. Shoot during the golden hour

In my early days of photography I didn't know much of anything about light. I would just go out and find what I thought was a pretty landscape and shoot away. For the most part I was dissatisfied with my results.
Palau
This picture from the island of Palau could have been much better if I had shot it at a better time of day. Shooting during what is known as the golden hour will really improve the lighting in your images. The golden hour is the hour right after sunrise and right before sunset. So there are really two golden hours in a day. When you are on vacation make good use of both of them.

When you shoot during the golden hours the light has a warm golden feel to it. The light is very diffuse because of the low angle of the sun so it eliminates harsh shadows. Look at this example of shooting during the golden hour.
Moulton Barn in Morning Light
If this image of the Moulton Barn had been made in the middle of the afternoon chances are I would have just deleted it. There would have been harsh shadows and there is a chance the sky would've been blown out (all white and void of detail). This image is what it is because of shooting during the golden hour.

2. Include Foreground Interest

I think this is one of the best things you can do for your landscape photography. It will make your images more interesting and will hold the viewers attention better. Place some prominent element or elements in the foreground of your composition. For example, look at the following photo that I cropped down to exclude the foreground elements.


It's pretty boring and uninteresting. Sure there was this beautiful mountain, but the image fails to hold the viewers attention

Now look at the original image with the foreground elements


The rocks add foreground interest and serve to hold the attention of the viewer.

3. Create Depth

The use of leading lines helps a two dimensional image seem more three dimensional. These will lead the viewer's eye into the image and hold his or her interest. Ideally the lines should lead to the focal point of the image.


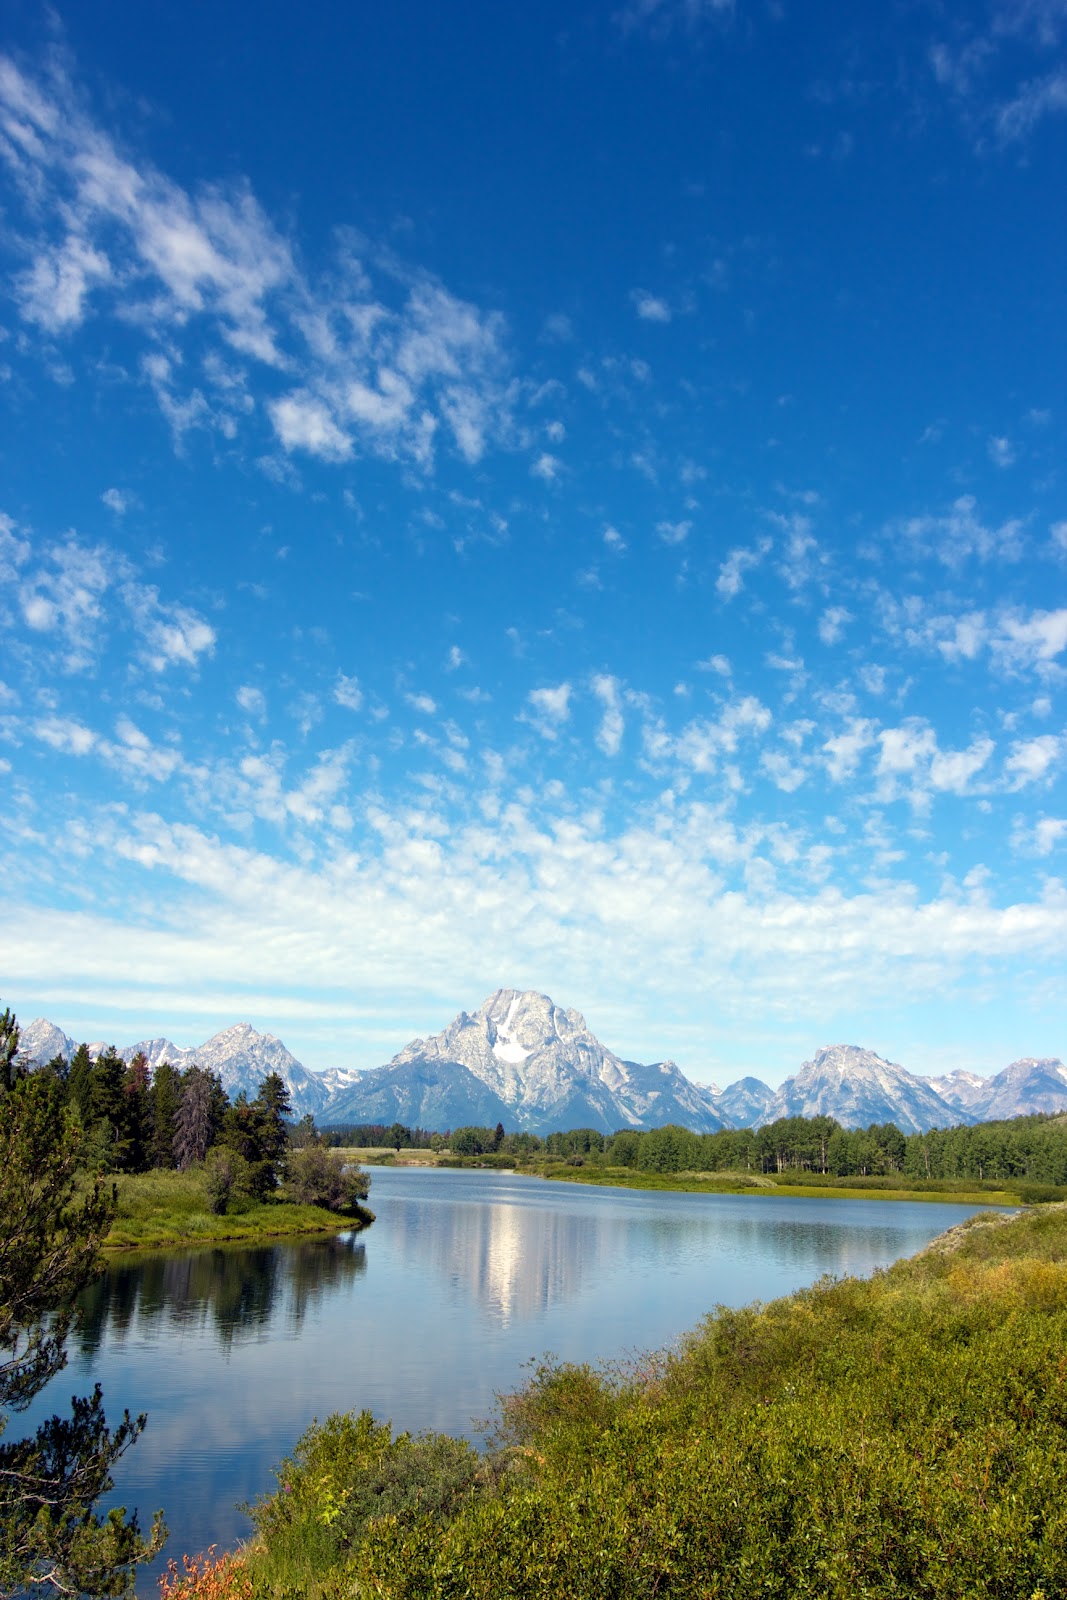
In this image of Oxbow Bend the lines of the river lead the eye to the mountains. The concept of using lines in an image to lead the eye is something that will greatly improve your shots. When shooting landscapes look for slightly different angles to shoot from that will create stronger leading lines. Using a strong foreground element will also add depth to your image.

4. Use Basic Composition Rules

I will simplify this tip by saying, use the rule of thirds. There are other more complicated composition rules but learning the rule of thirds is the first rule that you should learn and master. Imagine the viewfinder or screen of your camera is divided into thirds both horizontally and vertically. Then align objects in your frame with those divider lines.


Notice how in my Snake River Overlook picture the mountains coincide with the top third line. If this sounds too hard for you then simply put your subject slightly off center in the frame. Don't put the horizon in the center of the frame. Like all rules, the rule of thirds is meant to be broken sometimes, but more often than not it is an excellent starting place for composition.

These tips are an excellent starting place for improving your landscape photography. Now get out and practice.


Thursday, September 13, 2012

Moulton Barn Part II

ISO: 100  Focal Length: 24mm 
0, -2, +2 ev
Aperture: f/8 
Quite often the key to good landscape photos is to chase the light. Usually this means shooting around sunrise or sunset. When I went to Mormon Row to have a look at this other barn, I wasn't expecting great shots. It was the middle of the afternoon and the lighting was not at a good angle. I snapped a few shots of the barn just for the heck of it and starting walking away. Then all of a sudden the sun lit up the  ground and barn beautifully. It made for a great contrast against the storm that was approaching. So I literally started running back to the barn to get this shot. The mountains and clouds make for a great background with the barn as middle ground and the grass as foreground. I processed these 3 exposures in HDR Efex Pro and brought up the lighting on the barn a bit with the dodge brush in Aperture 3.

Buy this and other prints through my gallery.

Sunday, September 9, 2012

Photo Contest Tips

I decided to enter my first non online photo contest. It was the Utah State Fair and I found out about the photography division. My cousin Tony from Tony Murray Photography (check out his work, it's amazing) helped me out with some tips on entering the contest. I ended up getting 4th in the landscapes division, which I felt pretty good about considering it is one of the more competitive classes.


My Snake River Overlook picture was my choice for the contest

Here are some tips on entering a photo contest

1. Find a contest, fairs are a great place to start. Look for photography groups in your area. You can also look at photographycometitions.net for national and international contests. I would recommend starting with local competitions before you go to the national or international scale.

2. Find your strongest images. Look through your library and find your best pictures. Make sure that they are well composed, sharp, and are technically well executed. If in doubt ask other photographers or friends what images they think are the strongest.

3. Read ALL the rules for the contest. I made the mistake of just skimming the rules of the contest and ended up realizing the morning I was to take my print to the fair that my mounting was incorrect. So my wife helped me to scramble to fix the mounting so I could enter. Read the rules and read them carefully.

4. Get a high quality print. Go to a professional photo lab to get your print. DO NOT go to Costco, Walmart or the like. Get a high quality print on high quality paper. I chose to print mine on metallic paper, because it is very glossy and has a metallic luster to it.

5. Pay close attention to your mounting/matting. Sometimes it is best to just have it done professionally. Many contests will judge your print and the mounting/matting of the photo.

6. Take your photo to the contest in some sort of protective covering. When I took my picture in, it was raining, which could have ended my chances before they started.

7. Go to the gallery and enjoy all the entries in the contest. If your photo doesn't win, study the winning photos so you can improve for the next contest. Figure out why they won.

Entering a contest can be a great way to examine your work and find ways to improve your photography.

If you want more info about my Snake River Overlook picture check out my post on it here.

If you are interested in purchasing a limited edition print of this image or some of my other work, keep checking back, I am currently looking at options for an online store.


Friday, September 7, 2012

Subway

ISO: 100  Focal Length: 28mm 
-.33 ev
Aperture: f/13  Shutter Speed: 2.0s
The Subway is one of Zion's most famous places and it is also one of the top sites for photography in the park. Although it is so famous there are usually few people around because it is a very long hike in and the traffic is limited. The hike is about 10 miles round trip and is very strenuous. If you want to do the hike you will need to reserve a Zion backcountry permit. The hike is a bit technical and for the most part there is not a well defined trail. You basically follow the river once you are down in the canyon.

After about 5 miles of hiking you will get to the Subway portion, which is actually quite short. It is named for the tunnel like formation of the cliffs, see the image at the bottom of the post.

The image with the pools was a pretty straight forward composition. I wanted the lowest pool to be in the lower third of the picture to add foreground interest. The cascade of pools provided a great sweeping line that gives the image depth.


As for the more technical details of the shot, I had a polarizer filter on my lens and chose the small aperture of f/13 so I could get the long shutter speed that would give the water a very smooth look. For post processing I took down the highlights a little, gave saturation a slight bump and sharpened it for the final result.


Tuesday, August 28, 2012

Yellowstone Pool

ISO: 100  Focal Length: 28mm 
-.33 ev
Aperture: f/9  Shutter Speed: 1/125
The colors in Yellowstone are pretty amazing. The clear blue pools with swaths of orange around them make for great pictures. I arrived at this particular pool pretty late in the day, so the lighting was pretty flat. This did serve to illuminate the colors well. To get this shot I crouched down low on the boardwalk so the stripes of orange would create a lot of depth in the image. I decided to darken the image by .33 ev so the skies would be better exposed than what the camera originally metered for.

A big tip for shooting in Yellowstone: get up early. Everyday we would get up before sunrise and there was very little traffic. As it gets later in the day there are crowds of people everywhere.

Saturday, August 25, 2012

Aspen Sunburst

ISO: 400  Focal Length: 12mm 
2 Shots bracketed at 0 and -2 ev
Aperture: f/22  Shutter Speed: .4s and 1/10

Originally this morning was supposed to be all about a waterfall. I had driven up near Sundance and hiked in a few miles to shoot Stewart Falls in the morning light. After shooting there I was hiking back and came upon this beautiful scene. I positioned the tripod so that the sun would just be peaking out behind an aspen and set my aperture to f/22 so I would get that nice sunburst shape from the sun. 


I composed the image this way so there would be the sunburst on the left and a stand out aspen on the right to balance the frame. These are the most dominant elements in the frame and are what will draw the eye the most. The forest floor that is carpeted with ferns serves to add interest and depth to the picture. With the sun in the frame I knew I would need to bracket my exposures for an HDR image. I set my camera to take pictures at 0, -2 and +2 exposure compensation. Once home I processed the files in HDR Efex Pro and ended up only using the 0 and -2 exposures. The original exposures are below.


Although I was originally just looking for good shots of the waterfall, this might be my favorite image of the morning. So keep your eyes open for other opportunities for great images when you set out with a specific subject in mind.

Friday, August 24, 2012

Moulton Barn


ISO: 100  Focal Length: 20mm   Exposure Compensation: -.67  
Aperture: f/10  Shutter Speed: 1/125

Right after shooting at the Snake River overlook we hurried over to the famous Moulton barn on Mormon Row in Grand Teton National Park. It was lucky that we got there in enough time for the light to still be a good golden color. I composed the shot with the intent of cropping it down for a wide print. The trees on the right and left of the frame serve to help balance the shot. The dirt path in front of the barn added a nice diagonal line to the shot that helped give depth to the image. Having the path and brush in the foreground, the barn in middle ground and the Tetons in the background really helped to make a good composition. 

The post processing this image was very minimal. I bumped up the saturation and vibrancy just a little and cropped it down. It is always best to get as much right in camera as possible.

Wednesday, August 22, 2012

Snake River Overlook

f/8.0 ISO 100
3 Shots at 0, -2, +2 ev

I was filled with apprehension before the trip to Yellowstone and Grand Teton National Park. Ansel Adam's Snake River overlook photograph is one of my favorite landscape images and I was nervous about how my images would turn out. It is important to get to the Snake River overlook in order to get a prime spot. By the time I got to the overlook there were already a few photographers. 

In order to get a better composition I stood on top of the wall that is at the edge of the slope down to the river. In order to make this work it is important to have a tripod that has independently adjustable legs. Two of the legs can go to the right and left of you, but the third leg will go right in between your legs.

The s bend of the river really draws the eye into the image, which is one of the big draws of the Snake River overlook. In this case the river points almost directly at the peak that is highlighted by the first rays of the sun. These lines that lead you to the focal point (the highlighted peak) are what make this a strong composition.

I chose to make this image from three shots and combine them with HDR Efex Pro. The image could have also been made by using a graduated neutral density filter. The final touch was to put a slight vignette on the final image.